Here's an example, using a Great Horned Owl that landed on a rooftop behind my house at dusk a few evenings ago. The owl seemed content to hang around some, so I got my digiscoping rig on it and fired away. These types of shots are prone to more noise because I used a high ISO (800) and a long exposure (1/8 second) with+.3 exposure compensation, and bumped up the levels in Photoshop later to get the image looking "right". After that, the image looked like this:

Not bad, but when you click the picture to enlarge it you will see the noise that I'm talking about. Newer cameras sensors are much less prone to noise at high ISOs than they used to be, but you'll see it, especially in dark, clear areas like the sky or in dark foliage. Even when I was using cameras with much more noisy sensors I'd bump up the ISO when I needed to get a faster shutter speed, because I'd rather have a sharp shot with noise than a soft one that was more "quiet."
So now, I go to the filter menu in Photoshop and pick "Noiseware Standard" from the options:
 Then it opens this window. I usually just push OK, letting it apply default settings. Or, you can run down the options that are pre-configured (like "Stronger noise"), or you can create your own recipe from the host of adjustable variables:
 After that, I work the pic per usual (crop, size, adjust contrast, & sharpen), save it for the web (quality 70), and I'm done:
 Toggle back to the un-noise-reduced version to compare the two- a pleasing difference, I think!
Now, I'm guessing that it is best to do the noise-reduction filter at first, working on the high-res side. However, it really cleans up older pics I have, too, even though I've done everything else including saving them for the web first. I could go back to the originals, but to have time for that I'm going to need a clone...
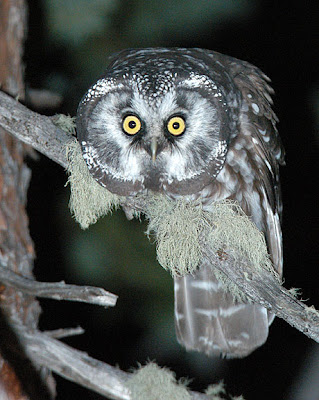
Here's an example of that. This Boreal Owl was photographed at really high ISO (1600) since I just had the built-in flash of my first DSLR body, a Nikon D100. The first shot is what you'll find on my web page, and the second is with the post-post-production step of applying the "stronger noise" filter:

 If you've been using this filter and have some tips on getting the most out of it I'd love to hear from you- leave a comment!


1 comment:
I've been using Neat Image as a PhotoShop plugin. It does a good job and is probably capable of much more than I demand of it, but I haven't gotten around to learning all there is to know about it yet.
One thing I don't like about any of the noise reduction treatments I've tried is the "plasticky" look you can get in details. It seems that if I do enough reduction to make the background or dark areas decent, my subject looks like a plastic model. Lately I've been processing my pics in layers and masking the subject. I'll do one level of noise reduction on the background and a lower amount on the subject. Often I do no reduction on the subject at all.
One nice thing I've found is that for web viewing or prints viewed at normal distances, you don't have to be all that exact with the mask, so it doesn't take as much time as you'd think.
Post a Comment